Tuesday, May 18, 2010

Focus Stacking

Macro photography has one main problem: Depth of Field (DOF).
At the close focusing distances used for macro photography, with magnifications around 1:1 or more, even small apertures like f/16 or f/22 will result in a DOF of just a few millimeters, or even less than 1 millimeter! Clearly, not good news if you wish to
get a full object in focus...

Here's a good example of this. Take a look at this shot of a minute shriveled leaf of a Christmas Plant (known as Poinsettia, or Euphorbia pulcherrima):


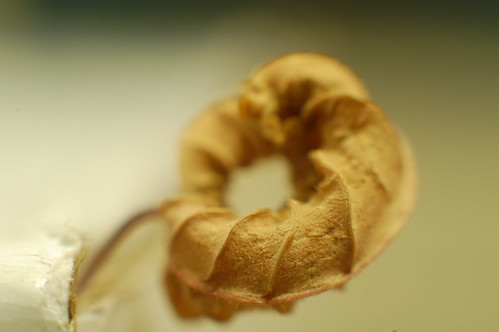
Clearly, only the tip at the front of the leaf is in focus, even though this was shot at f/16 (using a 50mm f/1.4 AI-S with a Macro Bellows and Focusing Rail).

The solution for this problem is only possible in Post Processing, and is called Focus Stacking.
It is a simple procedure in Photoshop, and I'll take you through the steps.

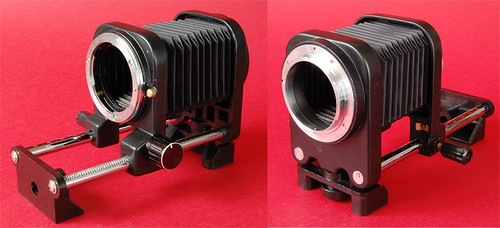
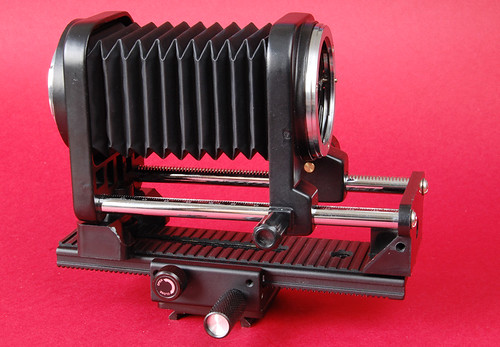
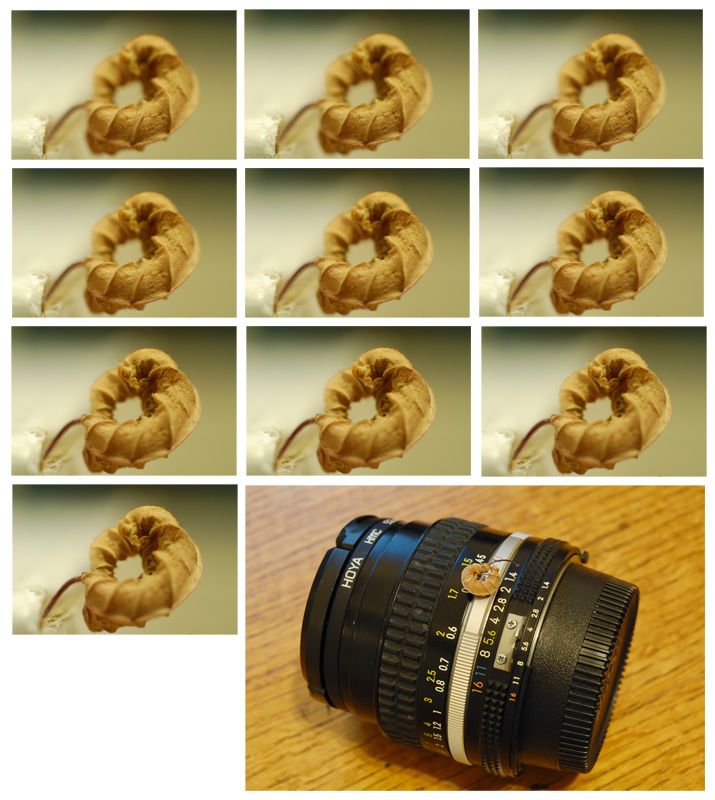
1) I have shot 10 photos of the leaf. It is absolutely necessary to use a sturdy tripod, to keep the framing constant between shots. It will make your life easier down the road.
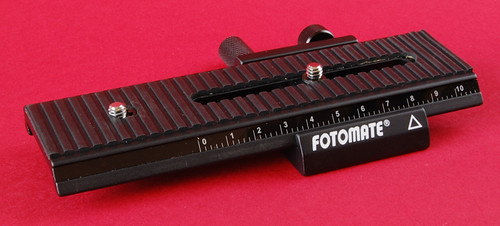
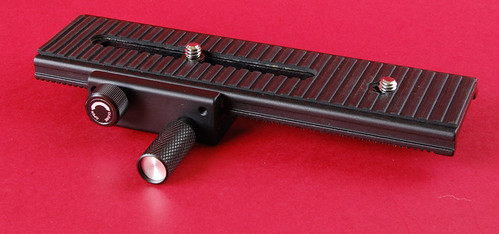
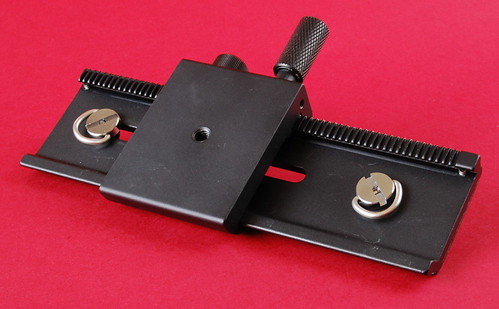
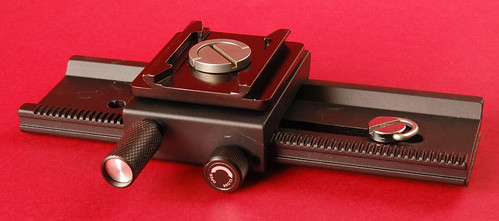
I started focusing at the very tip, and then moved the Focusing Rail just a fraction of a millimeter between each shot.
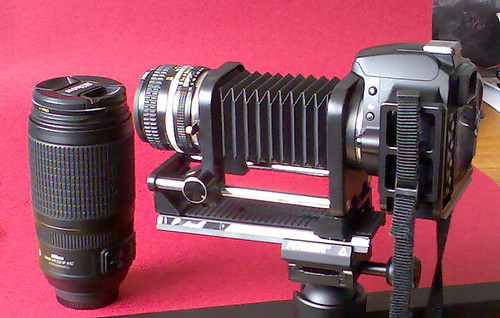
You can see the full set below, and the leaf on top of the 50mm f/1.4 AI-S to give you a sense of scale.


2) Load them all into Photoshop (CS4 in this case), and add them all as separate layers in a new file. It helps the tool if you order the layers in the same sequence as you shot them.

3) You'll need to align the photos, which is done easily by selecting all layers, and using Edit->Auto-Align Layers. Use the "Reposition Only" option.

4) Now it is time to do the magic. Again select all layers, use the Edit->Auto-Blend Layers command, and select the "Stack Images" and "Seamless Tones and Colors" options.
Photoshop will create a mask in each layer, to use only the in-focus parts of each one, creating a final image that will be a blend of them all.
Here's the end result:


This is, of course, just a quick and dirty example, and I even didn't cover the entire depth of the leaf.
More shots with intermediate focus steps will help you creating an even sharper final image.

Sunday, May 16, 2010

Macro setup = Focusing Rail + Bellows


Having thought about trying out macro photography for a while, I checked a few options to be able to focus closer, with
out purchasing a dedicated macro lens.
Extension tubes are cheap and an interesting solution, but I wanted much greater magnification that a tube can offer, and also to go over 1:1 as dedicated macro lenses offer.
In the tradition of Tripod Kicks, it should be cheap, too!!
A few minutes of eBay browsing came up with a two part solution, to join together a 1-dimension Focusing Rail and a Macro Bellows unit. Additional searching showed that the cheap sellers were probably just getting their units from the same manufacturer, so I went for for the cheapest.
The Focusing Rail is from ebay seller Go4DC Photo Supplies. It cost €21 with free shipping.

It is all metal, with rubber on top. The large knob adjusts the position of the rail, and the small knob secures it into place. There are two captive 1/4'’ screws, with convenient hoops to tighten by hand. The bottom plate is just a single 1/4’’ threaded hole.
I intended to use this as part of an Arca-Swiss compatible system, so I took the old plate from my Phottix KB-1 Ball Head, and screwed it into place with a big spare 1/4''-20 T-Screw that I got from SunwayPhoto.
The next step was the Macro Extension Bellows, from eBay seller Hong Kong Supplies. It cost €24.50, free shipping.


It is mostly metal, and the bellows itself appears to be plastic. There is a single threaded 1/4’’ hole at the bottom of the back plate.
Unfortunately, the camera end does not rotate, so only a landscape position is possible.
The wider knob moves the geared front plate back and forth, and the smaller knob locks it into place. There is a button to unlock the lens, and that’s it.


I proceeded to attach the bellows and focusing rail, and soon discovered that I couldn't fit my Nikon D40 to the back plate when attached to the focusing rail, because it bumps into the protruding end of the rail. So I had to attach the camera first, and then screw the bellows into the rail.

After assembly of all items, it was time to test it!


I attached my D40 and the Nikkor 50mm 1.4 AI-S to the macro system, and tried to get a large magnification.
The system is very simple to use:
1. Set the lens to maximum aperture (so you can see through the viewfinder).
2. Set the focus ring to infinity (or just about anywhere, really)
3. To change magnification ratio, move the bellows to change the distance from the body to the lens. The farther it is, the greater the magnification.
4. To focus, move the focusing rail, effectively bringing everything closer or farther from the subject.
5. Set the aperture to the desired value, and shoot.

6. Check histogram, correct shutter, ISO or aperture, repeat.

Using the setup above, I managed to get this picture. It's the lettering on a B+W 67mm 010 MRC UV filter, from my recommended provider of cheap genuine Hoya and B+W filters: MaxSaver.

Tech details: D40 @ ISO200 / 1/2shutter ; 50mm 1.4 AI-S @ f/11The real size of this detail is about 1cm wide. Given that the D40 DX sensor is 2.37cm wide, that comes out as a 2.37:1 magnification ratio.
Over 2x life size, that’s pretty good!
Depth of field is a huge challenge here, probably less than a millimeter at f/11.
Additional techniques will be needed for usable images, like focus stacking in post production (click for a quick tutorial).
Interestingly, reversing the lens (with a BR2A ring) will give you the same magnification, but with increased working distance (about 6cm instead of 2cm). The problem is that now the back glass element is exposed, with no filter to protect it...
For reference. this is the same subject, but using the 18-55 kit lens at 55mm, and closest focusing distance. Quite a difference.